Create and Edit an EfL Form
Create and Edit an EfL Form
EfL Forms are created using EfL Form Templates which have been set up by Form Managers.
This guide assumes that you already have at least one EfL Form Template set up for your setting.
Once you have an EFL Form Template set up, Form Users can use this to create as many Forms as required using that format. This guide shows you how to create new Forms for Learners, edit Forms and compare Forms over two points in time.
Here is a video that shows how to create a new Form for a Learner
Here are the steps to create a new Form for a Learner
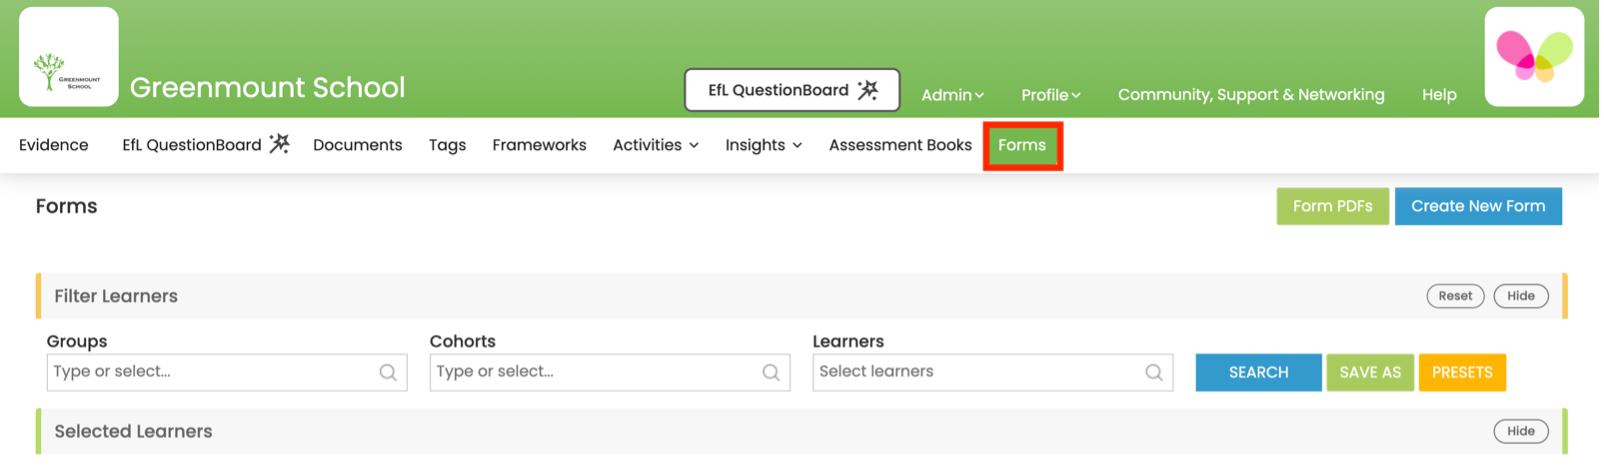
1. On a computer, login to the Web Console and select Forms.
See below...
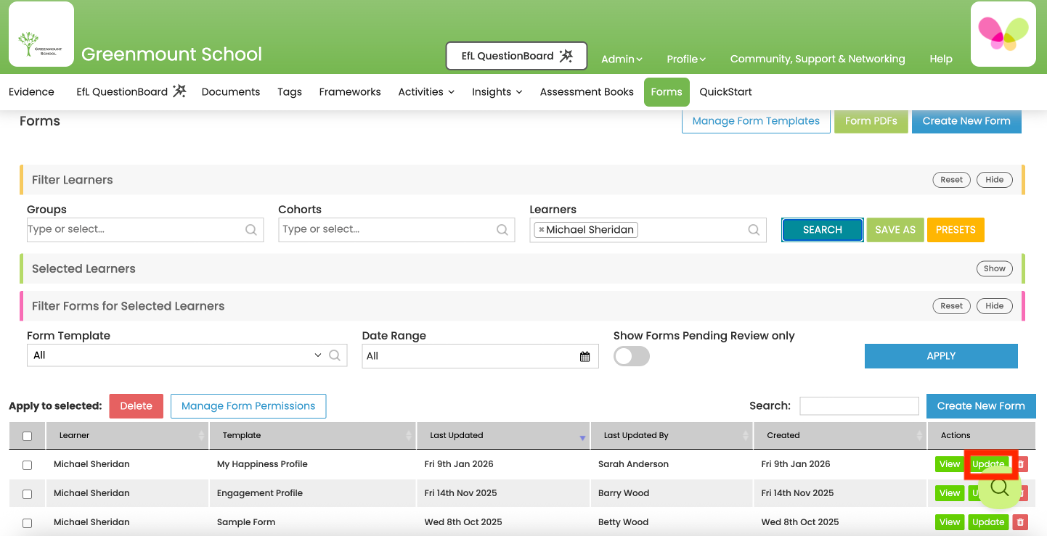
2. Select the Learner or Group/Cohort of Learners that you would like to create Forms for and click Search.
See below...
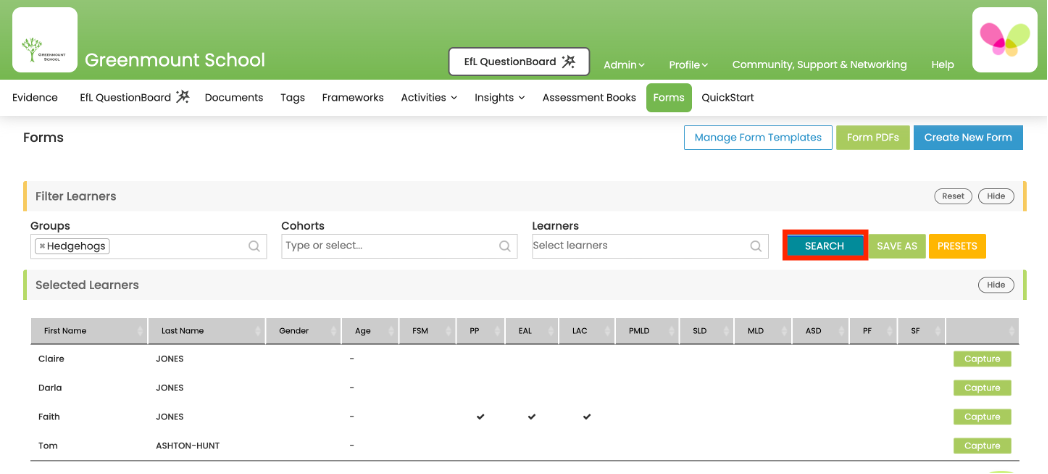
3 The Learner or Group/Cohort of Learners will appear under Selected Learners. Select Create New Form (top right) and a pop-up window will appear asking you to Choose a Form Template.
See below...
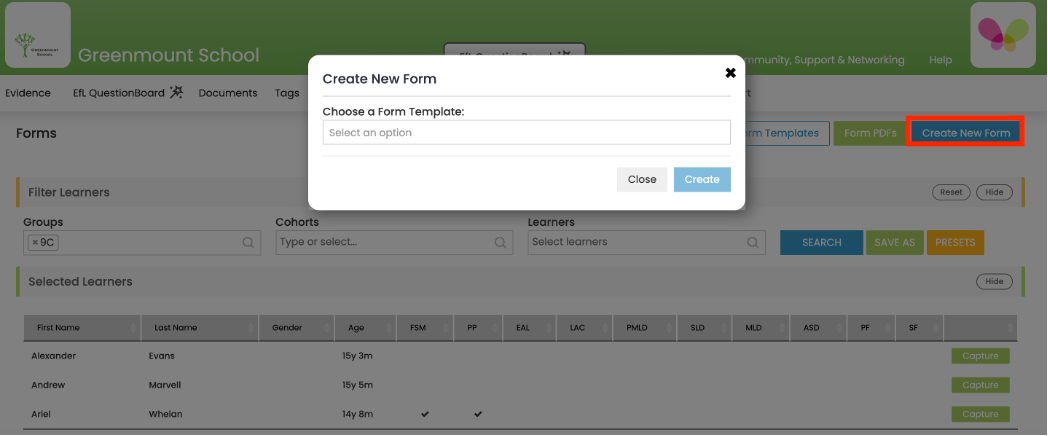
4 Select an option by clicking in this box and choosing the appropriate Form Template. Click Create. The pop-up window will then extend to ask who you would like to create the Form for.
See below...
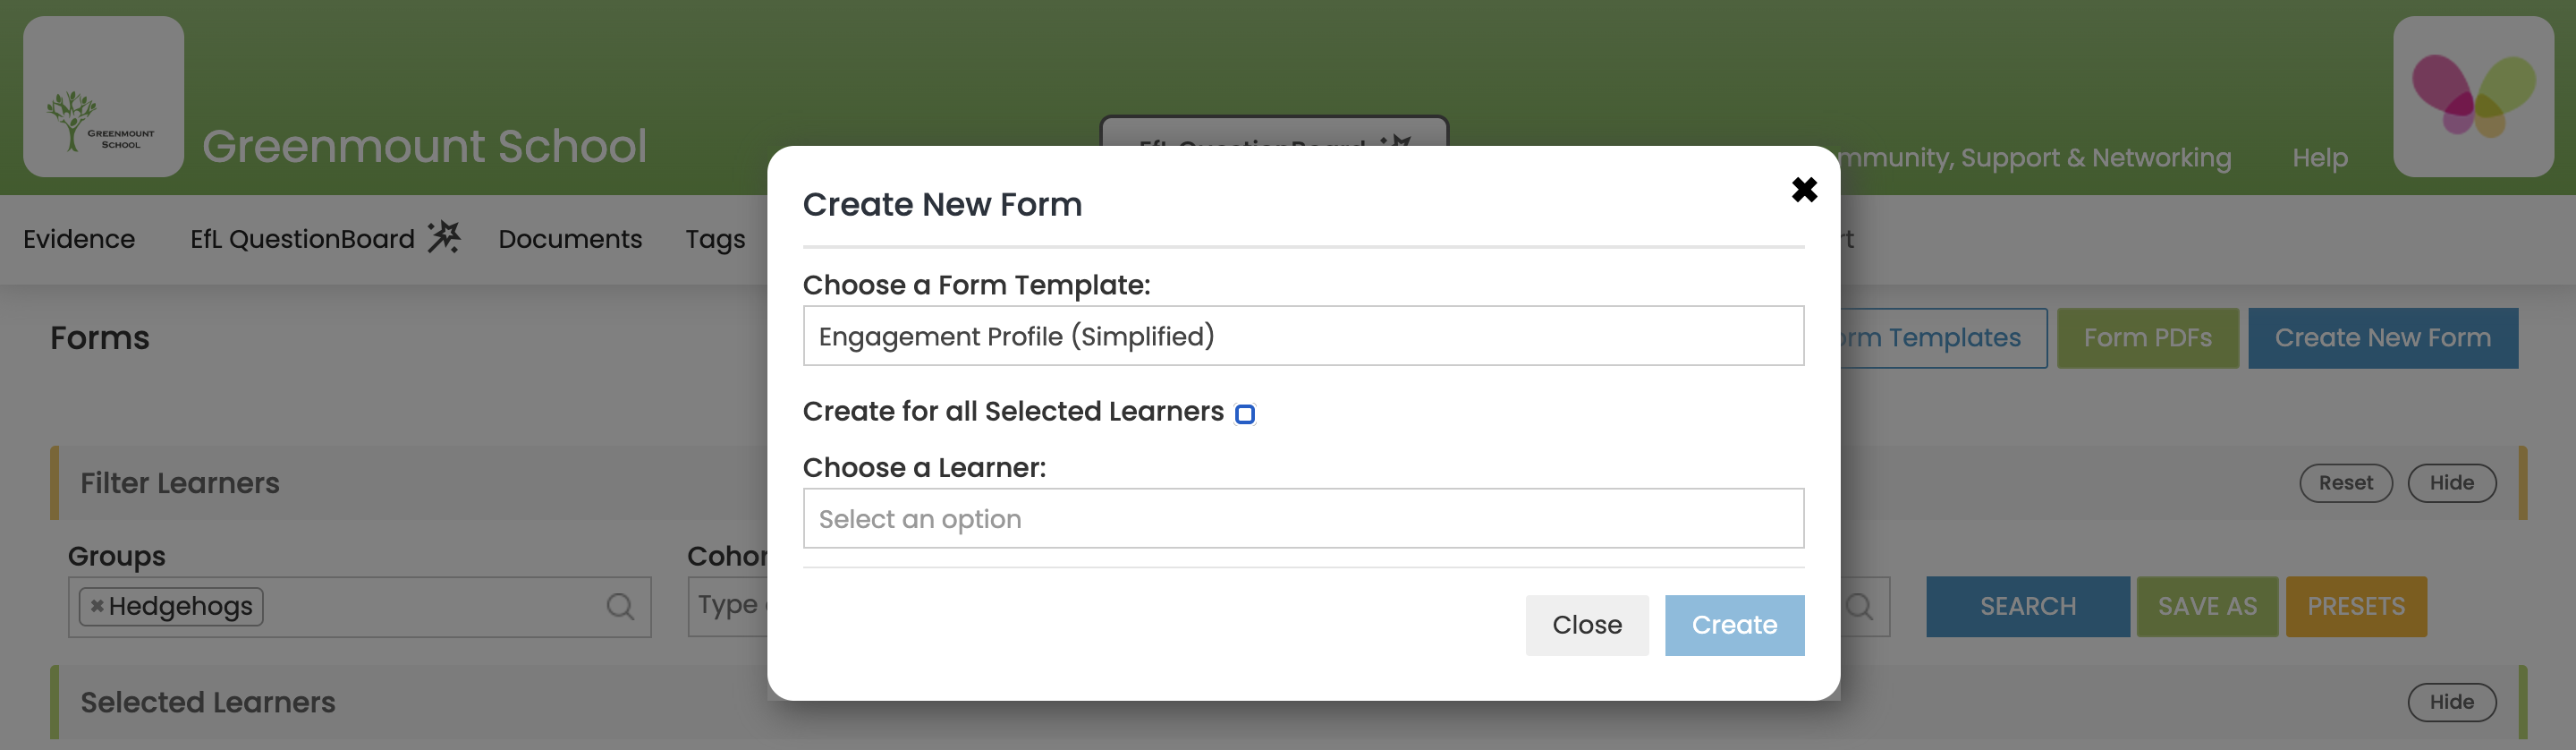
5 Tick Create for all Selected Learners and the filtered Learner/s will appear in a list. Alternatively you can Select an Option under Choose a Learner to create a Form for an individual Learner.
Select Create.
See below...
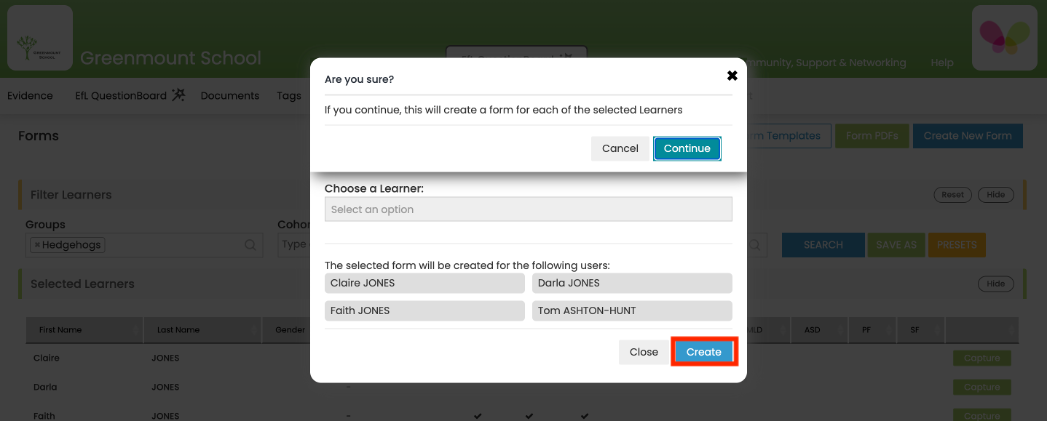
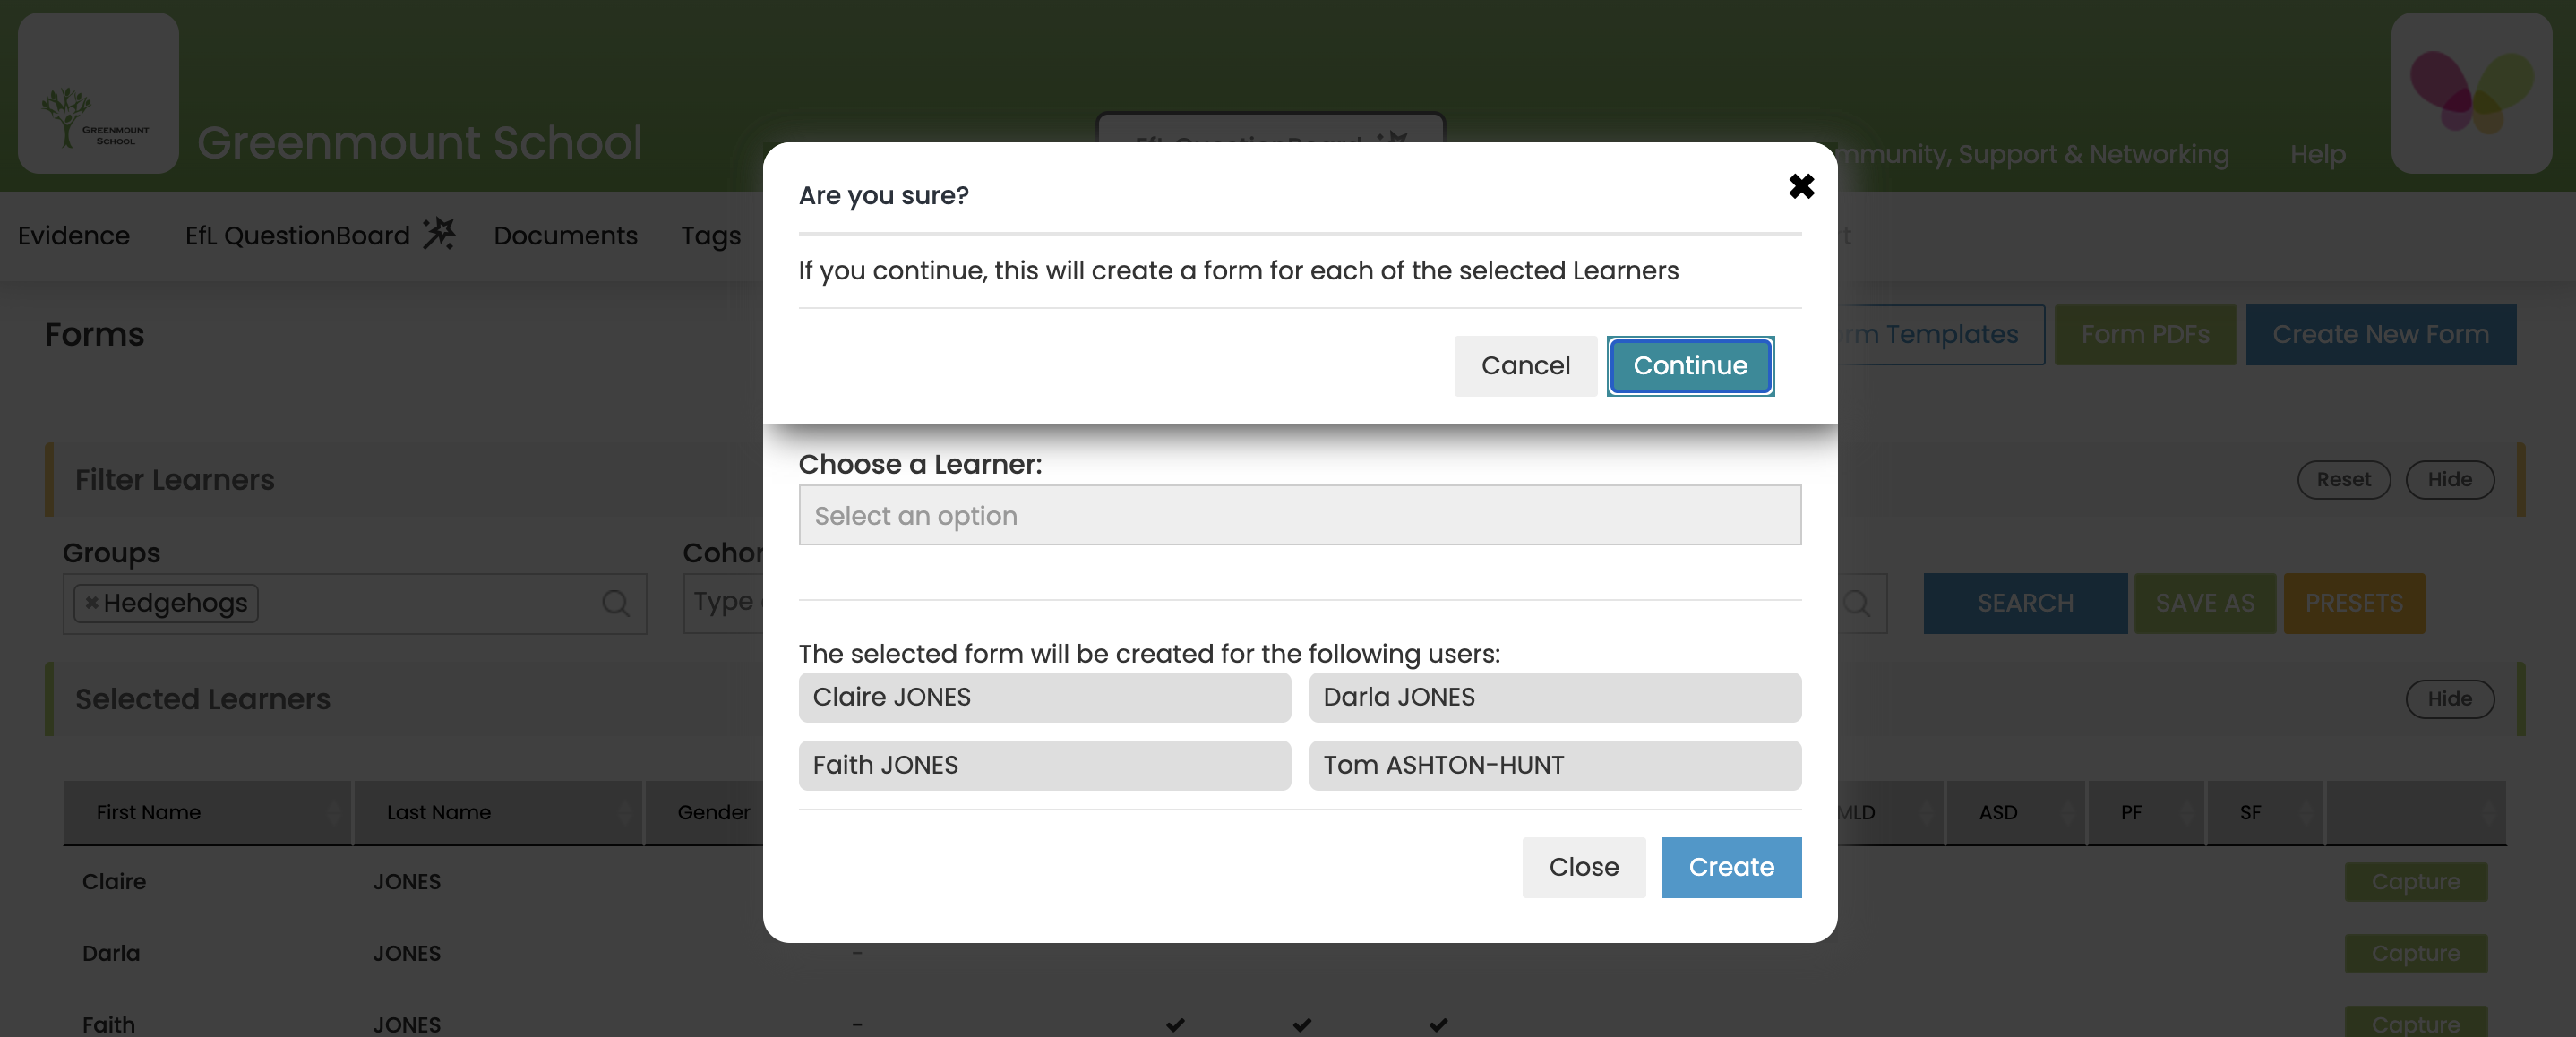
6. An additional pop-up will ask if you are sure of your selection. Select Continue.
See below...

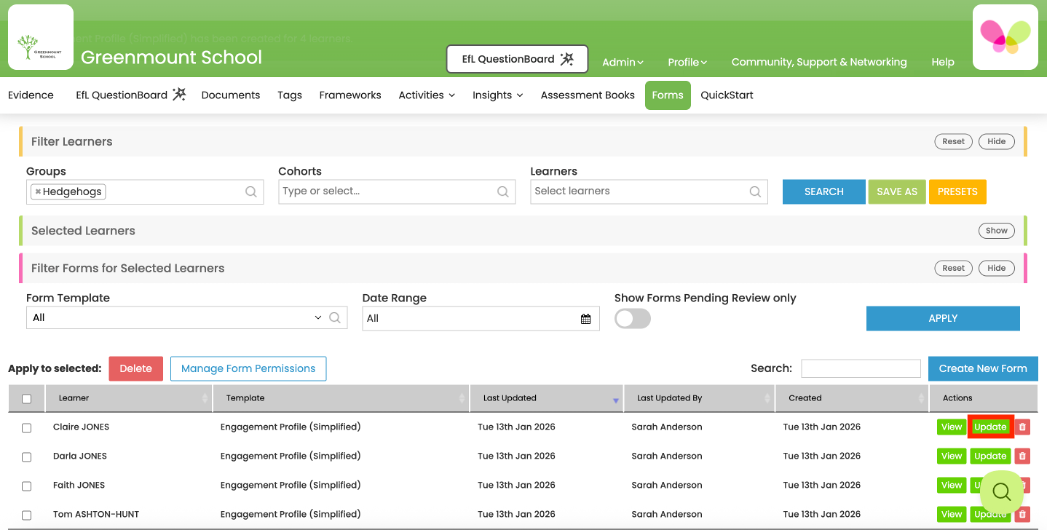
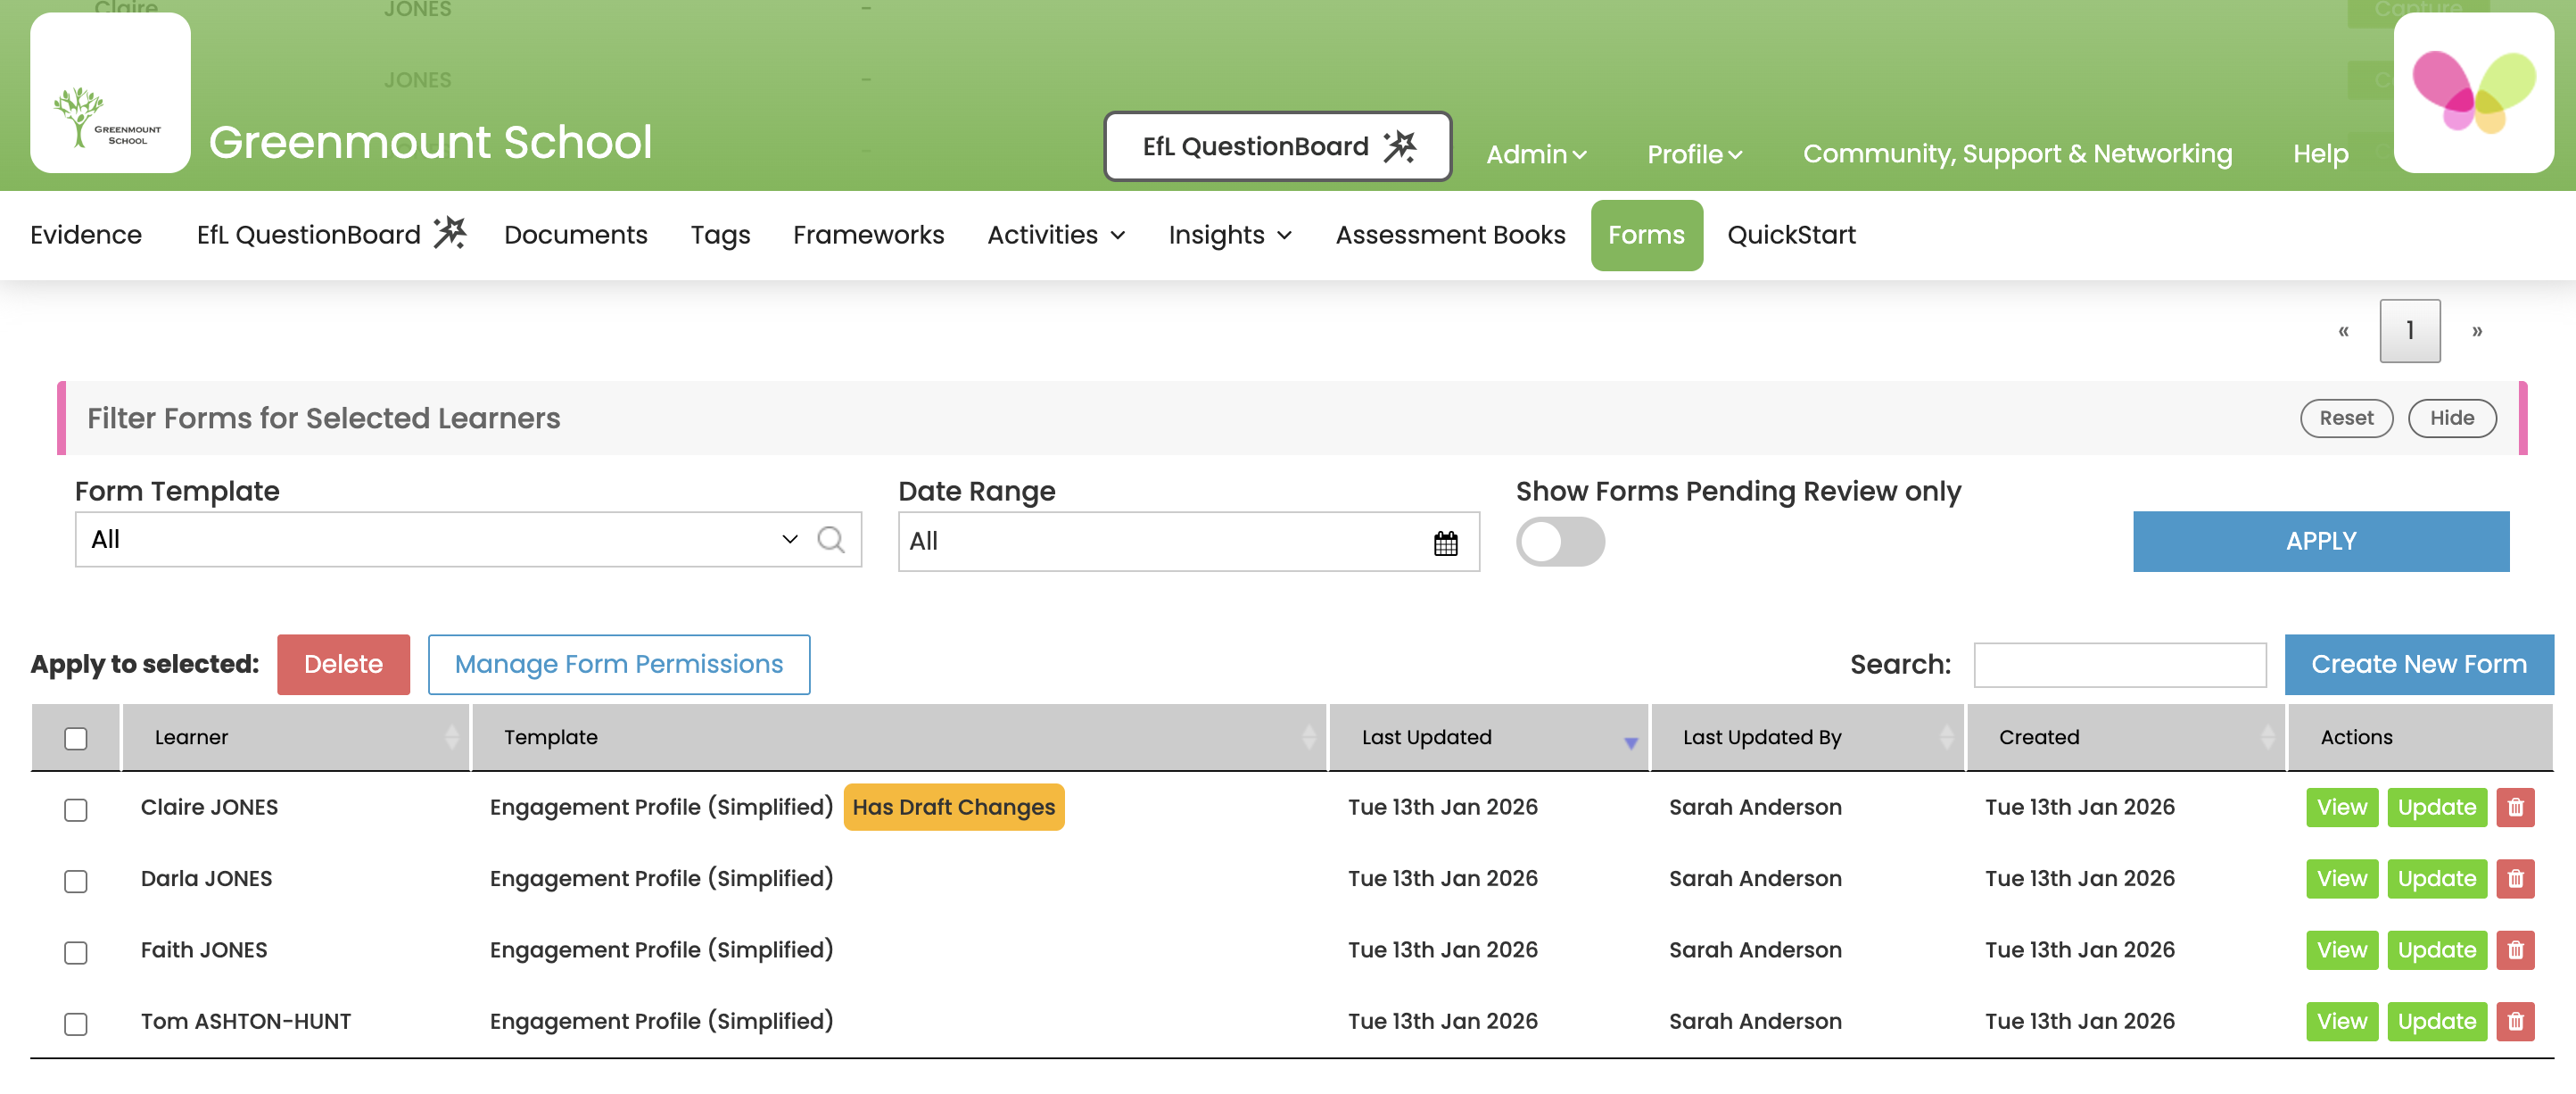
7. The Forms for this group/cohort of Learners will then appear at the bottom of your screen. Select Update next to the Learner’s Form you wish to add information to.
See below...
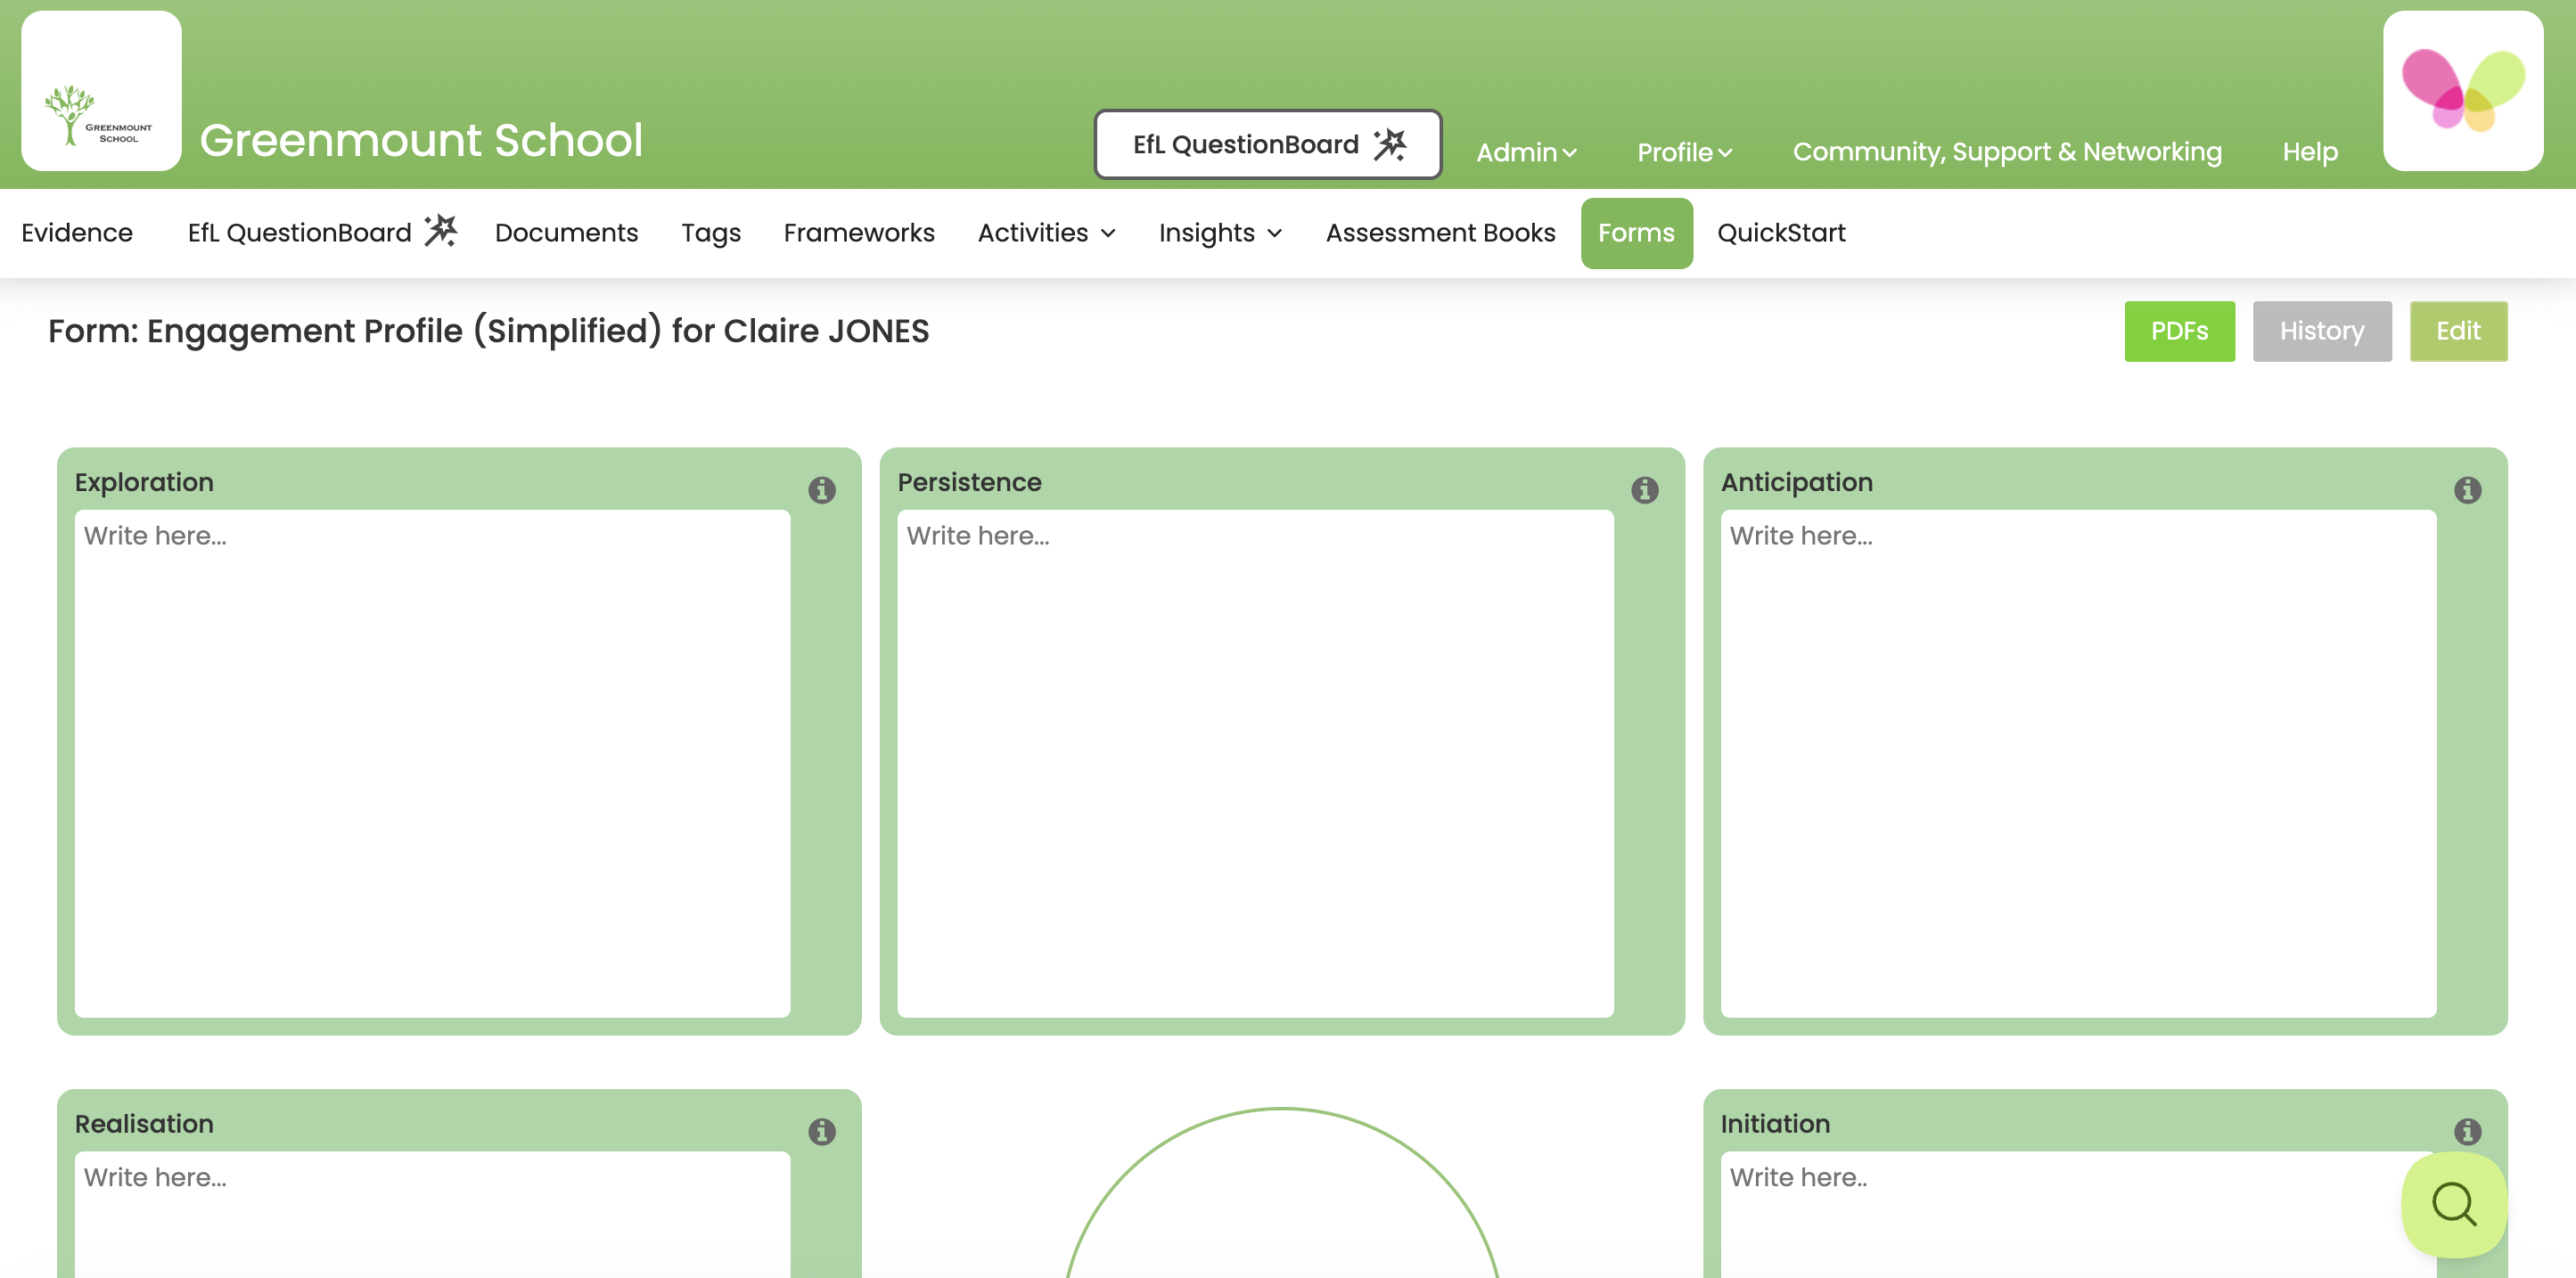
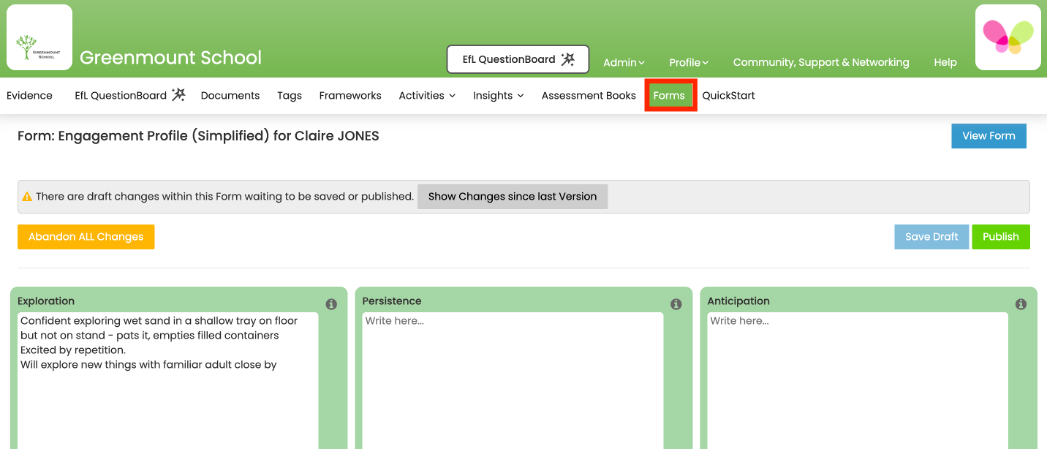
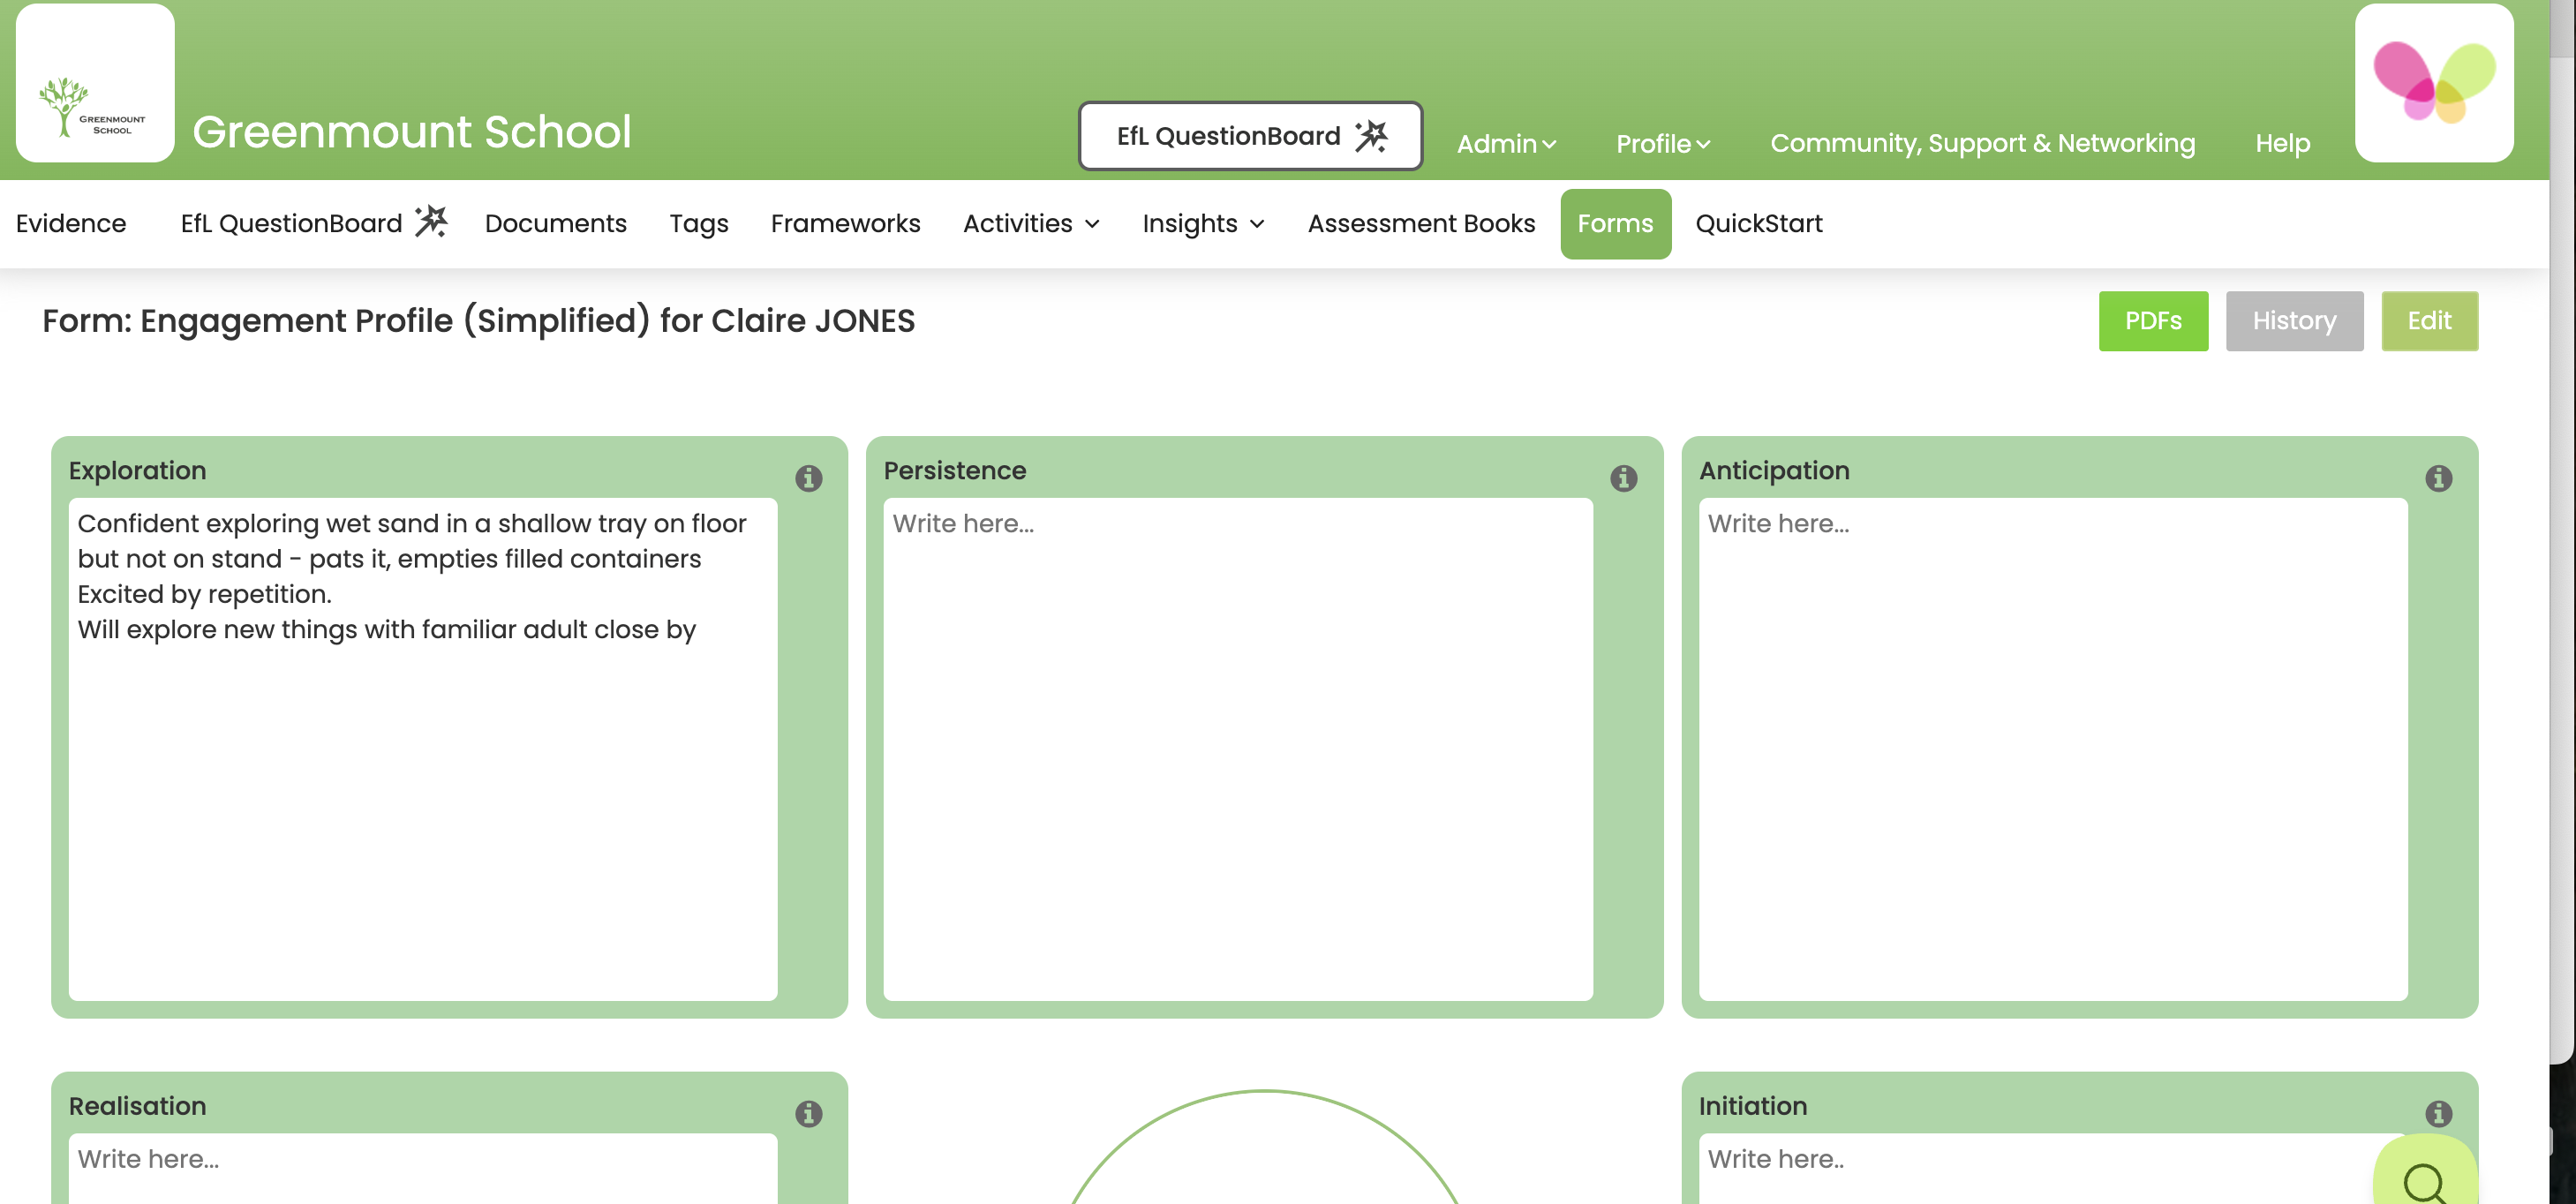
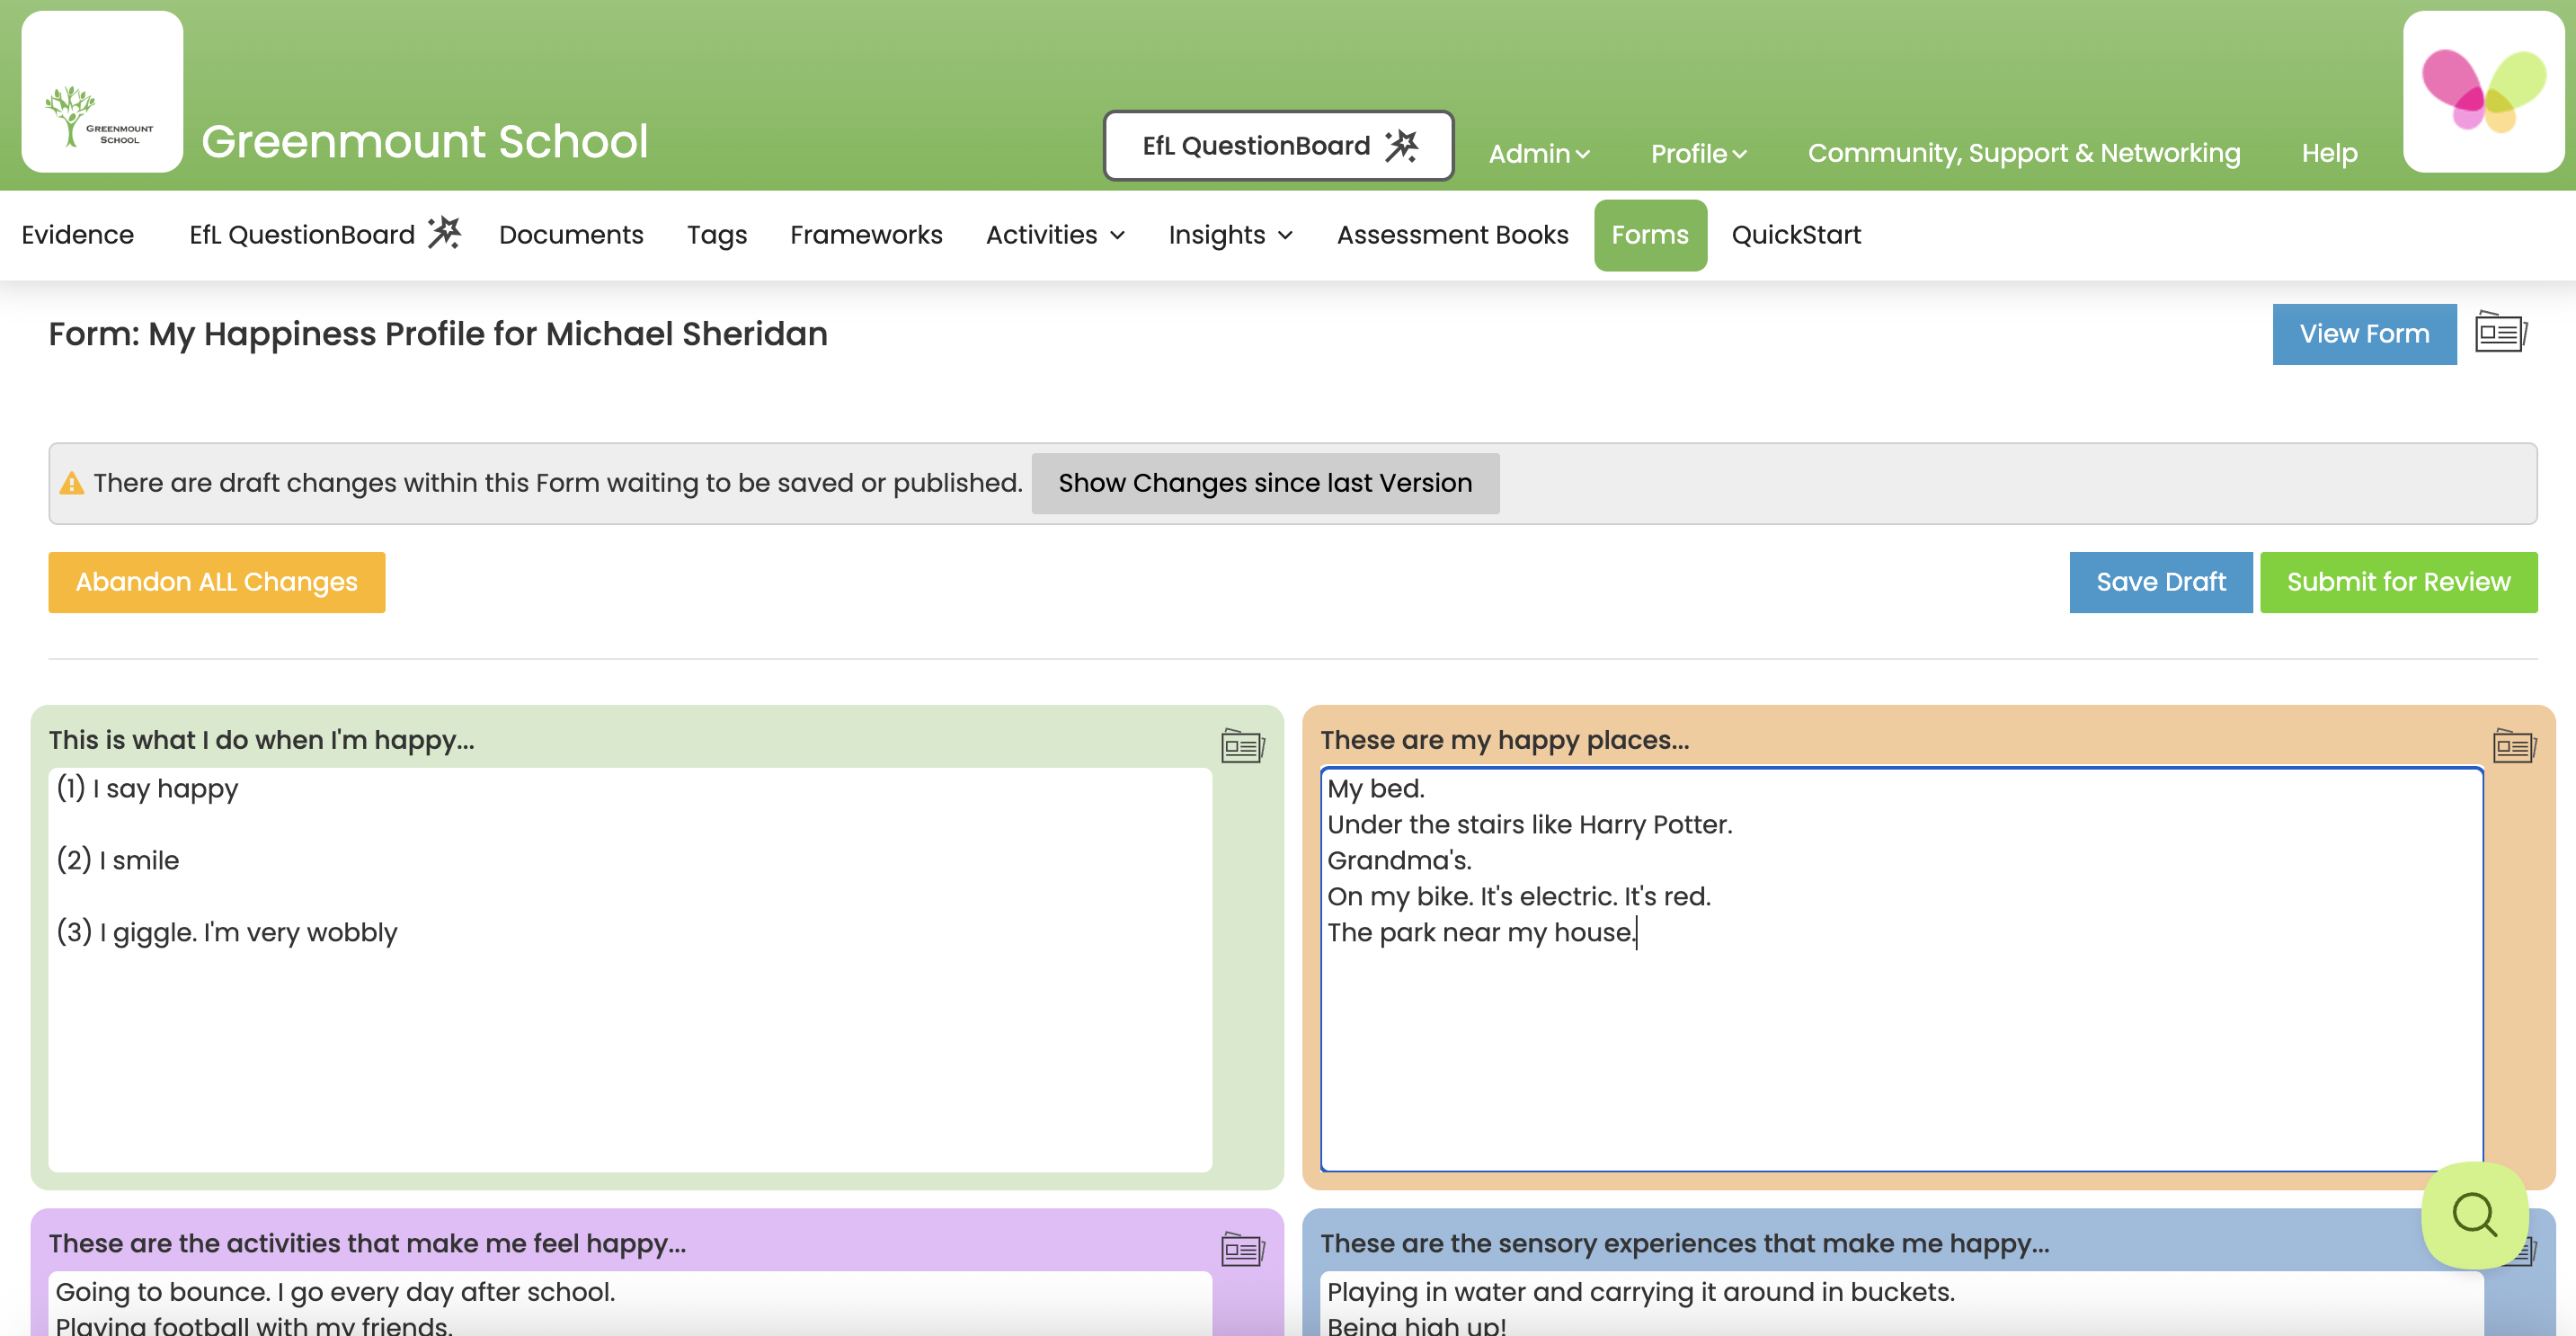
8. Your named Form will then appear onscreen. Click on an Element to add text.
See below...
9. As soon as you start adding information to a Form a banner appears at the top of the page reminding you to ‘Save Draft’ or ‘Publish’ the information you’ve added.
See below...
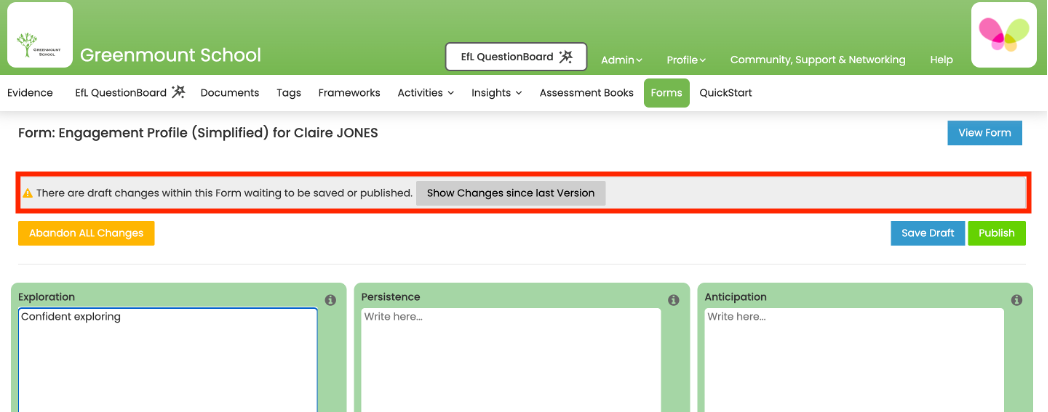
Save Draft – This will save a single draft copy of the Form. You can return to it to add any further information but this won’t be tracked.
Abandon All Changes – You can click on this to delete all the changes you’ve made since the Form was last saved as draft/published.
Publish – This will save a published copy of the Form. If the Form Template for this Form is configured to save historical versions any changes made over time will be tracked and you can compare different versions of the Form in order to note progress/changes.
10a After saving a draft copy you can return to an area of EfL by clicking on the tabs along the top. In this example I return to Forms.
See below...
You can then scroll down to view the status of the Forms you have been working on.
See below...
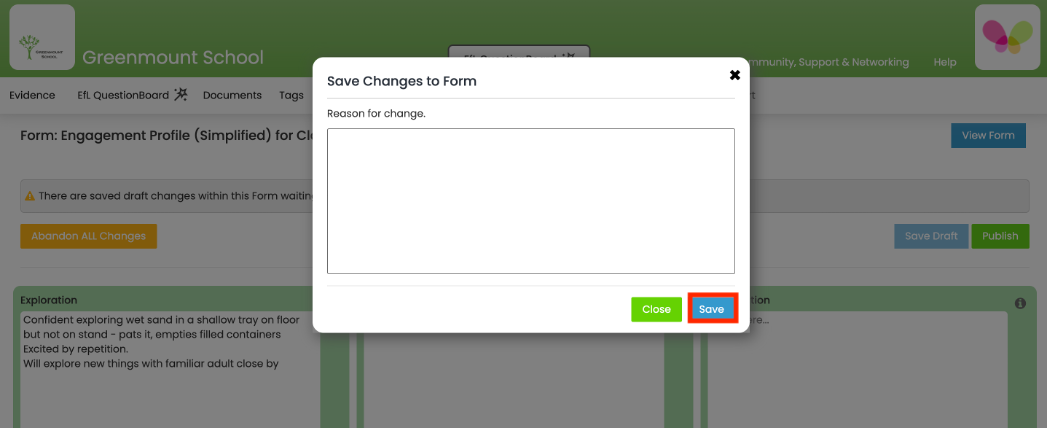
10b After selecting ‘Publish’ you will be given the option to give a reason for making changes to the Form. Click ‘Save’.
See below...
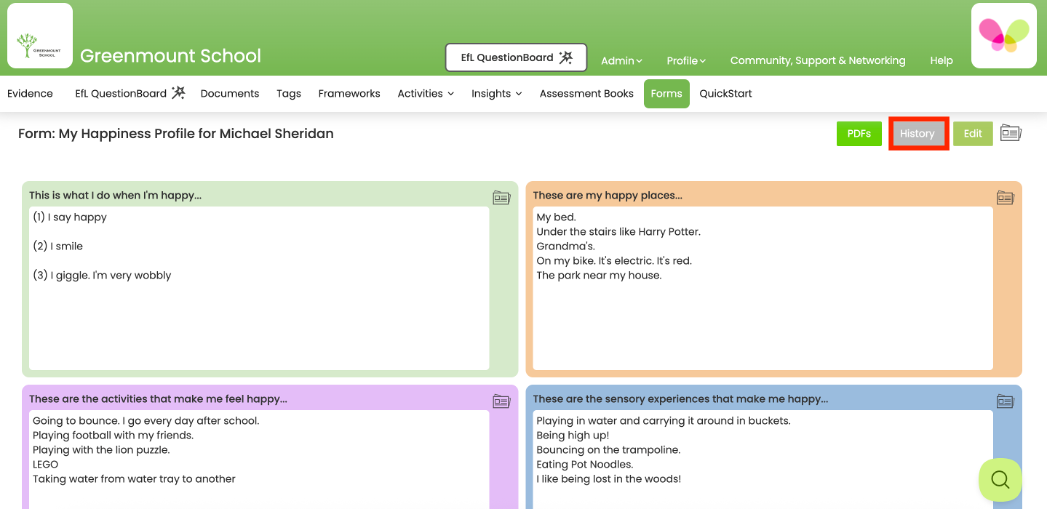
Once an EfL Form has been published it can be used as a comparison with historical versions using the History button.
The published version of the Form will then appear onscreen.
See below...
From this screen you can choose to print the Form, continue to edit the Form, compare historical versions of a Form or return to the main screen by clicking on the tabs at the top of the screen.
Here are the steps to edit a Form for a Learner
1 On a computer, login to the Web Console and select Forms.
See below...

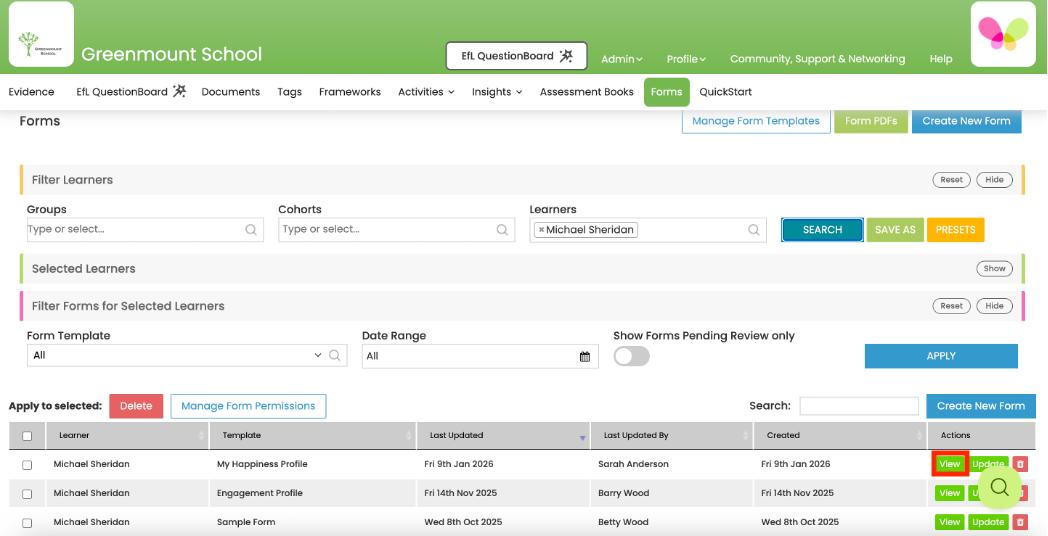
2 Select the Learner whose EfL Form you would like to edit and click Search. The EfL Forms available for this Learner will then be displayed at the bottom of the screen.
Click Update next to the Learner’s EfL Form that you would like to Edit.
See below...

3 The EfL Form will then appear on screen and you can start to type into any of the Elements.
See below...
4 You can then Save Draft or select Submit for Review (if the Form requires approval) or Publish. See Steps 9-10b above for further information.
Here are the steps to compare historical versions of a Form
1 On a computer, login to the Web Console and select Forms.
See below...
2 Select the Learner whose EfL Form you would like to compare historical versions of and click Search. The EfL Forms available for this Learner will then be displayed at the bottom of the screen.
Click View next to the Learner’s EfL Form that you would like to compare.
See below...
3 The EfL Form will then appear on screen. Click on History top right.
See below...
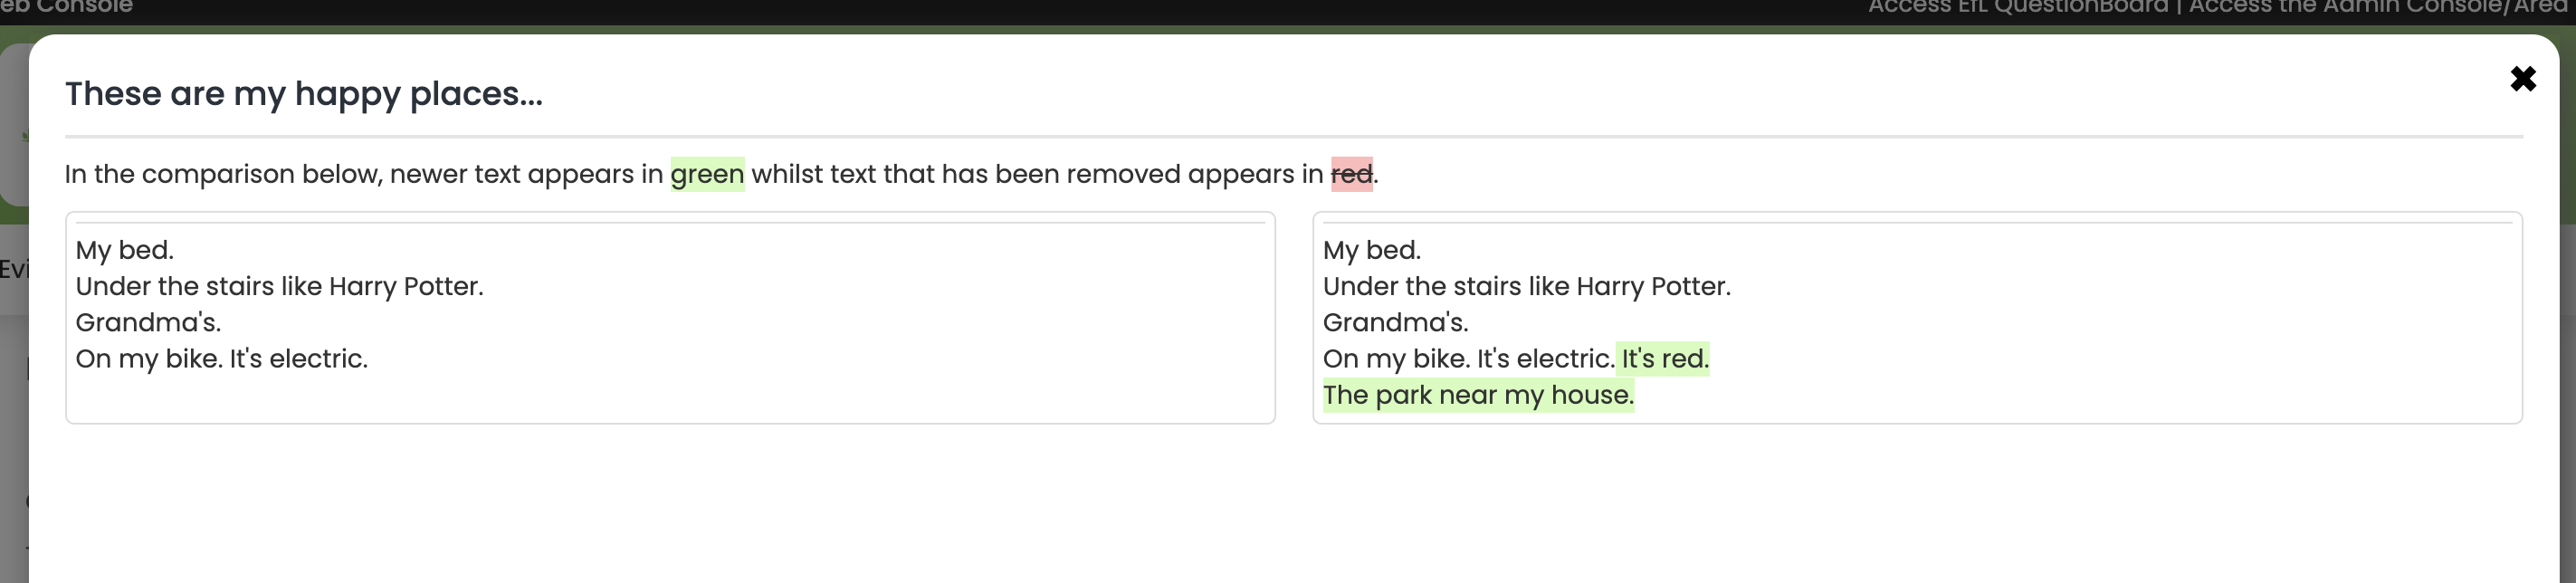
4 You can then insert the dates of the two versions you would like to compare. Any Elements that have changes between the 2 versions being compared will be highlighted.
See below...

5 Click on these Form Elements to compare the contents at the two points in time selected. Newer text is highlighted in green and text that has been removed appears in red.
See below...
6 Click Close (bottom right) to exit this pop-up and either select a different Form Element to compare or return to View Form (top right) to either produce a PDF of the Form or Edit the Form.
Now that you have created a Form for a Learner from a Form Template you can produce a PDF of the Form to either Print or Save a Copy.
Please see our video/guide on how to Print a Form.